Sending meeting minutes made easy with iPROT
In our blog entry on how to write meeting minutes effectively with iPROT, we briefly showed you how easy it is to send logs with iPROT. In this article, we would like to revisit this topic and discuss a few specific points relating to sending minutes:
Check minutes before dispatch
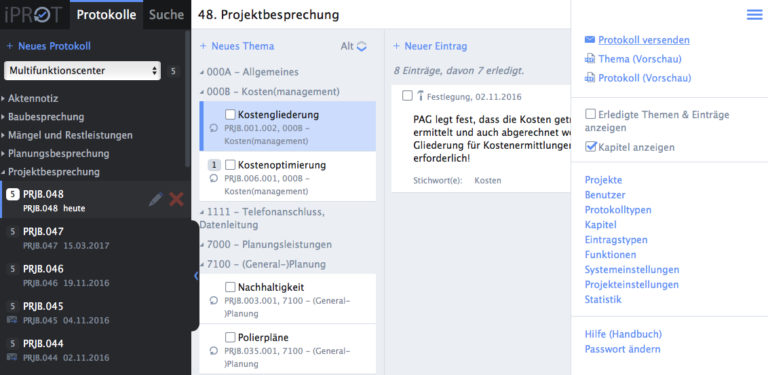
Once you have finished writing and compiling your report with iPROT, you can check the report again in the PDF preview before sending it. To do this, click on the “Minutes (Preview)” entry in the top right-hand menu with the small PDF icon next to it. Details can also be found in our manual under View protocol in PDF format.
If you have called up the PDF preview, the current status of the active log being processed is usually displayed directly in your browser in a new tab or window. Now check in particular whether the details in the list of attendees and distribution list are correct and complete. If necessary, you can use the pencil-shaped change icon in the column with the minutes directly in the user interface to correct the attendee and distribution list as well as other key data of the meeting. To complete the personal data, it is best to use the user administration, which you can access via the menu at the top right.
Also make sure that you have not forgotten any topics or entries, because for reasons of revision security, topics or entries cannot be added to or changed in a log that has already been sent.
Customize protocol layout and settings
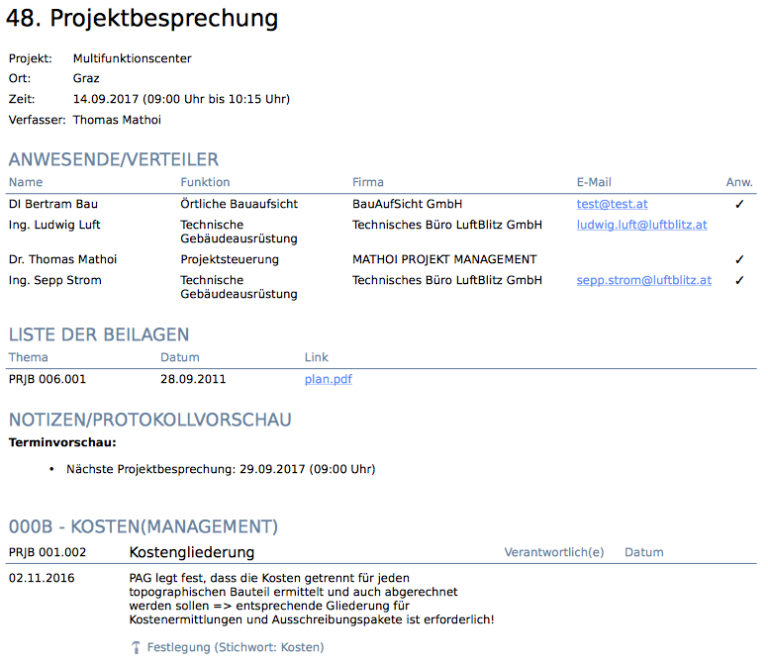
By default, the log in iPROT is formatted in a single column (point number/date, and the text of the entries next to it). Additional information (person responsible for tasks, the “to be completed by” date, etc.) is displayed below each entry.
Alternatively, you can choose a multi-column, tabular layout in which the person responsible and the date information (completed by, completed on) are displayed in additional columns alongside the item number, the topic heading and the one-day text.
The desired formatting can be set either in the system settings (applies to all projects) or in the project settings (if the log layout for a project is to be set differently from the other projects).
If you want to change the display of the list of attendees and distributors on the cover page of your minutes, you can set this according to your requirements. Details on this can be found in our handbook in the chapter entitled Designing the list of attendees on the cover page of the minutes.
The automatically generated list of enclosures and the protocol clause can be easily changed in the system settings with regard to their position or hidden completely. To do this, simply call up the system or project settings via the menu and make the desired settings under the menu items Enclosure list and Protocol clause or Protocol clause item. You will also find all the details in our manual, either under List of enclosures or under Protocol clause and Protocol clause item.
Shipping with one click
In the last and final step, you can now send the log to the persons listed in the distribution list by clicking on the “Send log” menu item. Each person listed on the distribution list receives an e-mail with a link that can be used to download the minutes as a PDF file. You can define the text of the dispatch e-mail in the system or project settings. You can find out how to do this in our manual in the eMail subject and eMail text chapter.
As soon as a log has been sent, iPROT records in the background who has already downloaded (and presumably read) the log. You can track this by clicking on the small letter symbol in the far left column of the respective log, which is created as soon as the log has been sent.
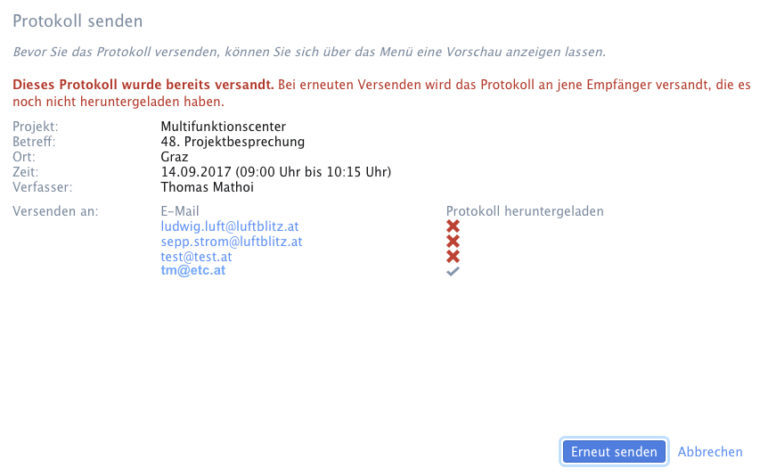
The “Send log” dialog will then open and next to the list of email addresses to which the log has been sent, a check mark will indicate whether the log has been downloaded. There is a red cross next to the e-mail addresses from which the log has not yet been downloaded. You will also find a note in red that this protocol has already been sent.