Quick start part 2 – Writing the first minutes with iPROT
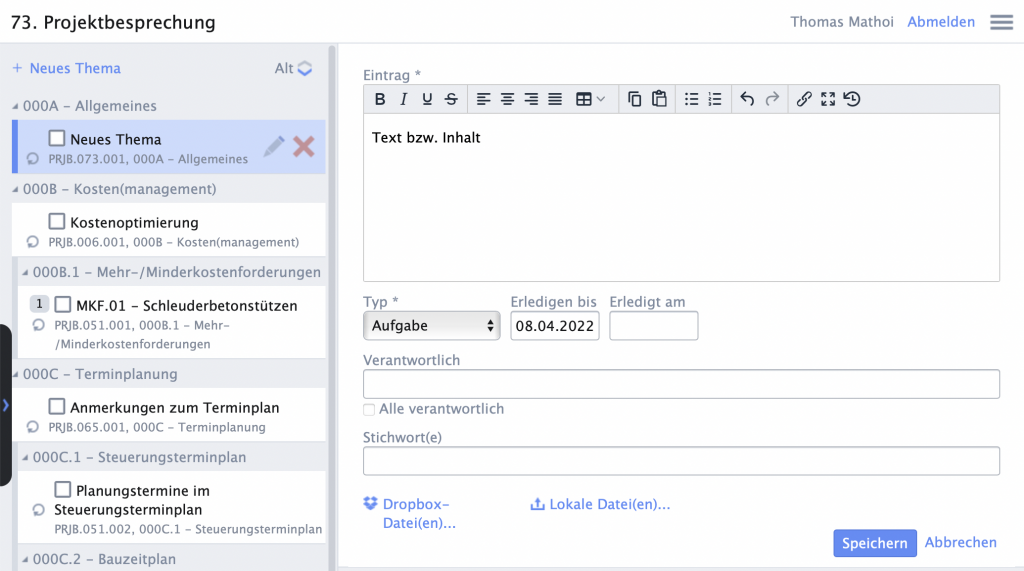
To create a log, you only need the two right-hand columns of the iPROT user interface, so you can hide the left-hand column with the log types and logs, especially on a smaller notebook or tablet screen. To do this, simply click on the small blue arrow in the tab on the right-hand edge of the black column on the left-hand side of the screen. If you want to show this column again, simply click on the same arrow again. The direction of the arrow changes depending on whether the left-hand column is shown or hidden.
Create a new topic
You can create a new topic in a log by clicking on the blue “+ New topic” link at the top. An input option for the name of the topic then appears and you can also make an assignment to a chapter in the log in this dialog and specify whether it is a continuous (i.e. in the sense of the endless log method) or one-off topic. One-off topics are then only displayed in the currently active log and are not included in the next, subsequent log together with the entries assigned to them.
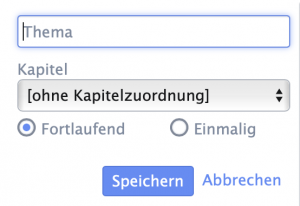
Click on the “Save” button to create the new topic in the selected chapter and mark it as an active topic. No entries for a new topic are displayed in the right-hand column.
Create a new entry for a topic
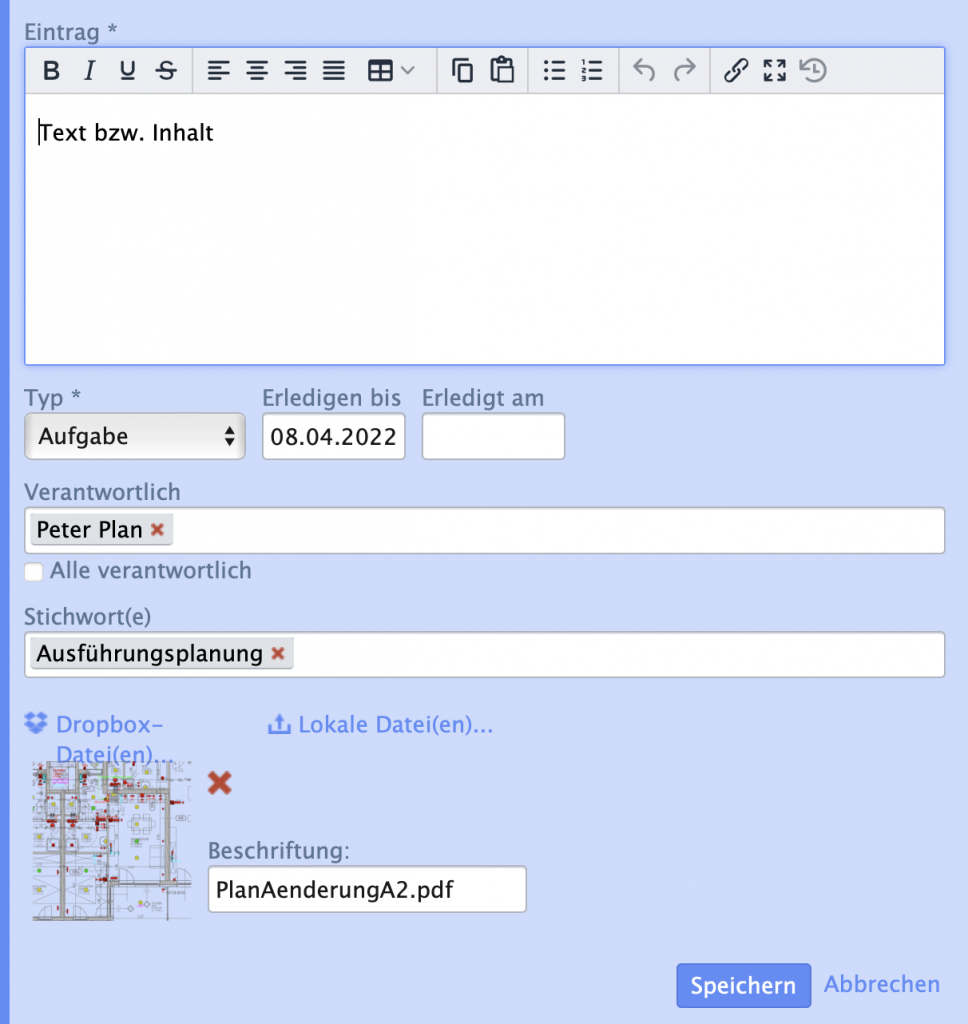
You can now create a first entry for your new topic by clicking on the “+ New entry” link in the top right-hand column. You will then be presented with an input dialog in which you can enter tags in addition to the text or content. You can also specify the type of entry in this dialog – e.g. task, decision, appointment, etc. These entry types are created in the settings. Details can be found in the iPROT manual under point. 3.7 Entry types.
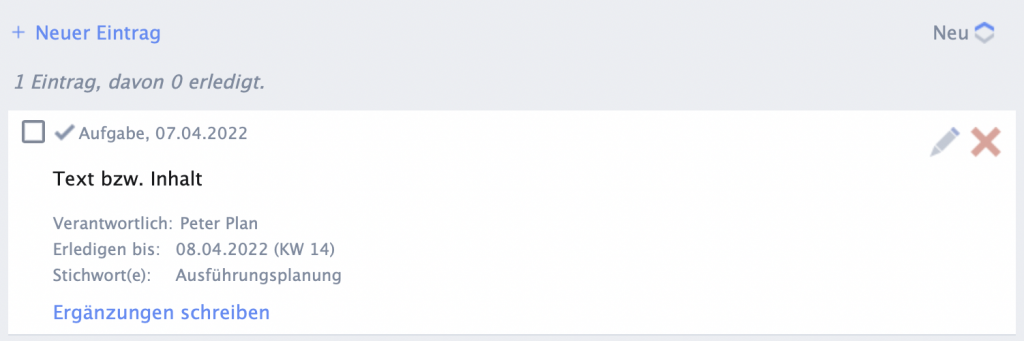
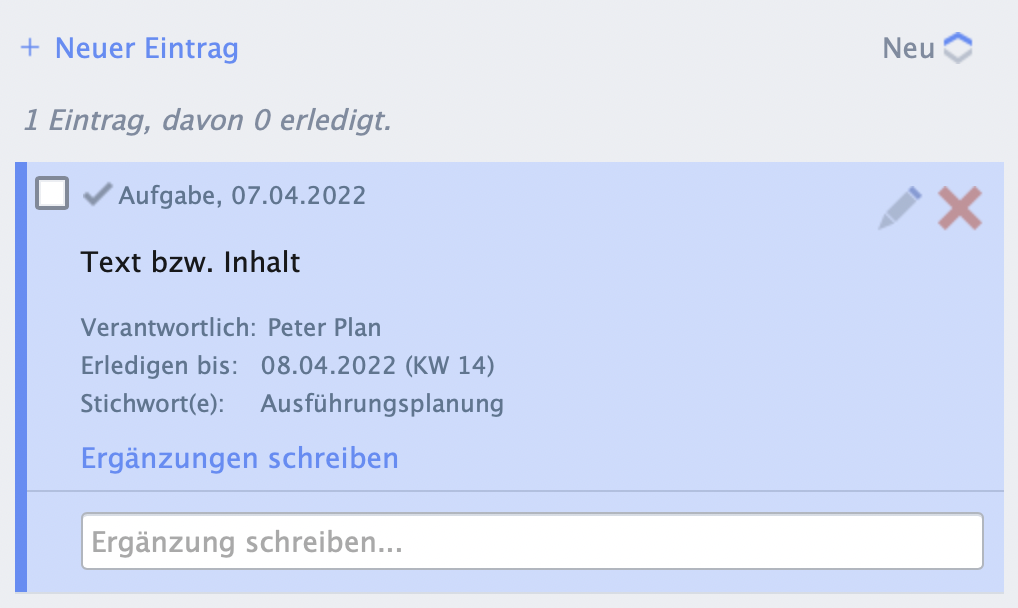
The metadata entered for an entry (person responsible, dates, tags, etc.) is displayed directly below the respective entry. The entry type itself forms the header of the respective entry. In addition to the entry type, iPROT displays the date of the meeting for which the entry was generated.
Editing topics and entries at a later date
Of course, you can also edit a topic or entry at a later date. To do this, click on the edit icon in the form of a small pencil to the right of the respective topic or entry. iPROT then opens the topic or entry in the input dialog. If you want to delete a topic or an entry, simply click on the red X to the right of the topic or entry.
For reasons of consistent, audit-proof documentation, editing or deleting topics and entries is only possible in a log that has not yet been sent using the iPROT integrated send function or for which no subsequent log has yet been created.
Attach images and files
If you are discussing project documents (e.g. plans) during a meeting, you can attach these to the respective entry using the “Local file(s) …”function. The selected files are saved directly in the iPROT project database and are therefore always available via a unique link.
Add to existing topics and entries
If an existing topic that has not yet been dealt with is discussed during the meeting or inspection, you can record the content of the discussion on this point as a new entry. Proceed in the same way as when creating an entry for a new topic. Or you can create a supplement directly for an entry from a previous meeting by clicking on the “Write supplement” link below the respective entry.
Please note that existing topics and entries from previous logs can no longer be changed for the reasons already mentioned for consistent, audit-proof documentation. You can find out more about the revision security integrated in iPROT in our blog article “iPROT is revision-proof“.
In the next part of our quick start guide, you will learn how to check and send the first log with iPROT and which settings you need to take into account.